How to Master Architectural Chaos: A Comprehensive Guide to Surviving and Building in Dumb Ways to Build

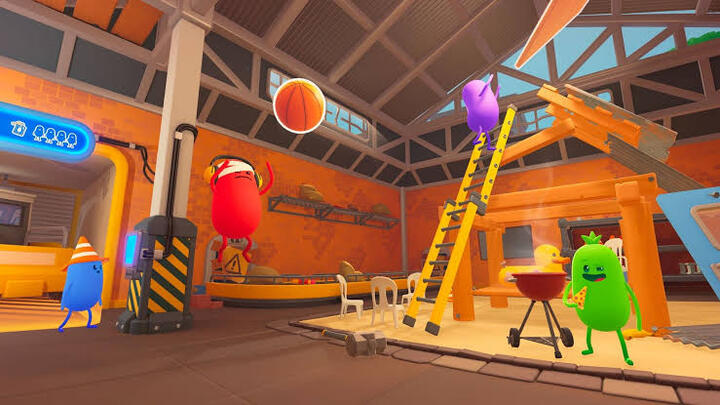
The beloved, slapstick universe of Dumb Ways to Die has expanded into structural physics with Dumb Ways to Build. This charming yet deceptively brutal construction simulator throws player intent against chaotic ragdoll physics, fragile materials, and absurd environmental hazards. Instead of simply stacking blocks, players must navigate unpredictable beam tensions, erratic Bean workers, and looming structural collapse. Mastering this game requires moving beyond simple trail-and-error placement and adopting systematic engineering principles tailored specifically to structural absurdity.
If you have spent hours watching your carefully designed skyscrapers disintegrate because a single Bean tripped over a support beam, you are not alone. The journey from frantic amateur builder to master architectural coordinator requires a deep understanding of weight distribution, material properties, hazard mitigation, and workforce management. This comprehensive tactical guide breaks down every phase of your construction career, providing actionable strategies to help you construct resilient structures, maximize safety ratings, and keep your chaotic Bean workers alive.

1. How to Understand the Core Mechanics: Physics, Joints, and Bean Behavior
Before placing your first girder, you must understand the fundamental physical forces governing the game engine. Dumb Ways to Build operates on a real-time weight-and-strain calculation framework. Every material block, beam, and connector carries mass, rotational inertia, and tension limits. When structural weight exceeds the joint capacity of a connection point, the joint snaps—often causing a catastrophic chain-reaction collapse across the entire build area.
Equally important is understanding the autonomous nature of your Bean construction workers. Beans are not static tools; they are unpredictable, physics-enabled entities programmed with basic pathfinding that frequently collides with active construction hazards. If a beam is swinging loose, a Bean will walk directly into it. Therefore, your structural designs must not only support their own weight but also account for the kinetic impact of clumsy workers stumbling through critical support corridors.
2. How to Select and Layer Initial Building Materials for Maximum Integrity
Success begins at the foundation layer. The game provides a wide array of materials—ranging from dense reinforced concrete and structural steel to brittle wood planks, glass panes, and elastic rubber bumpers. A common novice mistake is building an entire structure out of a single material type. To achieve optimal stability, you must implement a strict material hierarchy based on load-bearing requirements.
Aways reserve your highest-density, high-stress materials for the ground contact points and core vertical columns. Placing light, flexible materials at the bottom while stacking heavy concrete near the top creates a high center of gravity, guaranteeing structural oscillation and ultimate failure during high-wind events or worker collisions.
Essential Material Layering Rules
- Base Layer (Ground Level): Use Reinforced Concrete Blocks exclusively to absorb ground shock and anchor vertical load paths.
- Mid-Level Framework: Utilize Steel I-Beams to build rigid internal trusses and cross-bracing frameworks.
- Top-Level Enclosures: Deploy Lightweight Timber or Composite Panels for roofs and upper walls to minimize total overhead mass.
3. How to Master Foundation Anchoring and Center of Gravity Alignment
A structure is only as strong as its connection to the earth. In Dumb Ways to Build, foundation nodes act as the primary load sinks for your entire structure. If your center of mass shifts too far outside the footprint of these anchor points, the entire building will leverage itself out of the ground, tipping over like a felled tree regardless of how strong your upper joints are.
To maintain proper alignment, constantly monitor your structure’s center-of-mass indicator during the draft phase. If you are building asymmetrical designs—such as cantilevered balconies or extended crane arms—you must compensate by adding counterweights or tension cables anchored to the opposite side of the foundation grid.
Steps for Securing Unstable Foundations
- Widen the Footprint: Extend horizontal base beams outward by at least two grid units beyond the main building silhouette.
- Implement Diagonal Cross-Bracing: Connect vertical columns to foundation anchors using 45-degree angle brackets to distribute lateral shear forces.
- Equally Distribute Dead Load: Balance heavy interior equipment evenly across all primary anchor points rather than clustering them on one side.
4. How to Manage and Direct Your Chaotic Bean Workforce
Your Bean workforce is simultaneously your greatest resource and your biggest liability. Workers automatically carry materials from drop zones to designated construction nodes, but their erratic movement paths can easily trigger structural instability. Managing them requires setting clear operational zones and using directional markers to keep them away from high-risk zones.
High-stress construction sites quickly become chaotic when Beans collide with one another while carrying heavy materials. By creating dedicated one-way traffic loops for material delivery, you eliminate congestion points on narrow scaffolding platforms. Additionally, assigning specialized roles—such as designated welders, haulers, and safety inspectors—prevents underqualified Beans from attempting high-skill assembly tasks that carry high failure rates.
"A well-designed building in Dumb Ways to Build is only half the battle; the other half is keeping your workers from knocking it down while they build it."
5. How to Mitigate Dynamic Environmental Hazards and Disasters
As you advance through the campaign stages, the environment becomes actively hostile. You will face sudden wind squalls, localized seismic tremors, torrential rain, and even rogue meteor strikes. Each environmental threat attacks specific weaknesses in your architectural framework, testing your ability to adapt under pressure.
Wind hazards apply continuous lateral force against flat, vertical surfaces, making solid walls dangerous sails that can tear a structure apart. Seismic hazards, on the other hand, send violent horizontal oscillations up through the foundation, snapping rigid joints that lack elasticity. Designing for disaster requires embedding dynamic dampeners and pressure-relief gaps into your building layout.
Disaster Mitigation Tactics
- Wind Resistance: Incorporate open lattice framework tiles and angled windbreaks to allow air currents to pass through upper floors without transferring drag.
- Seismic Isolation: Interspace rigid steel joints with Rubber Shock Absorption Pads near the base layer to absorb ground vibrations.
- Fire Safety: Install automated sprinkler nodes near electrical junction boxes and keep flammable wooden planks far from heat sources.
6. How to Deploy Tension Cables and Dynamic Suspension Structures
When building high-rise towers or expansive bridges, standard rigid beams are often insufficient to span wide gaps without collapsing under their own dead weight. This is where tension cables and suspension mechanics become mandatory skills. Unlike rigid beams, cables excel at handling immense tensile forces while remaining lightweight.
To construct a stable suspension bridge or long-span roof, establish high-elevation anchor towers built from reinforced steel. Run high-tensile cables from these apex points down to the midpoint of your horizontal spans. This transfers the downward gravitational load of the mid-span directly into vertical compressive force on the main towers, allowing you to span massive distances without cluttering the ground plane with dozens of vertical pillars.
Suspension Optimization Checklist
- Verify Anchor Elevation: Ensure cable attachment points on towers are significantly higher than the span being supported.
- Balance Cable Tension: Adjust cable turnbuckle settings incrementally; over-tensioning pulls spans upward, while under-tensioning leads to sagging.
- Dampen Sway: Install secondary cross-cables diagonally between main support lines to prevent wind-induced torsional oscillation.
7. How to Troubleshoot In-Progress Structural Fatigue and Flexing
One of the most critical skills in Dumb Ways to Build is diagnosing structural distress before a catastrophic collapse occurs. The game visualizes stress through color-coded joint highlighting: green indicates safe load levels, yellow signals moderate strain, and flashing red warns of imminent failure.
When you notice a cluster of yellow or red joints mid-construction, panicking and adding random support beams often makes the problem worse by adding more unneeded weight. Instead, you must conduct a rapid structural audit. Determine whether the stress is caused by excess vertical weight (compression failure) or outward twisting forces (torsional failure), then apply surgical reinforcements.
Diagnostic and Repair Matrix
Visual CueUnderlying CauseImmediate Corrective ActionFlashing Red JointExtreme localized compression loadInsert a vertical support column directly below the jointBending/Flexing BeamsInsufficient lateral stiffnessAdd 45-degree diagonal cross-braces across the frame bayCreaking Audio CuesUneven weight distributionRemove non-essential decorative tiles from upper levelsOscillating FloorsResonance caused by worker movementInstall dampening pads at floor-to-column connection points
8. How to Optimize Cost-Efficiency and Resource Scarcity
In career mode levels, you are limited not just by physics, but by a strict construction budget and limited material allocations. Spending all your funds on high-grade titanium beams in the first two floors will leave you with insufficient resources to complete the required roof objectives, resulting in an automatic mission failure.
Efficiency requires calculated material conservation. Use high-cost, high-durability materials strictly at key load-bearing intersections, while substituting cheaper, lightweight options for cosmetic walls, interior partitions, and non-structural flooring. Mastering this economic balance ensures you maintain high structural integrity without exhausting your project capital.
9. How to Execute Complex Vertical Builds and Tower Construction
Building vertically introduces an exponential increase in structural complexity. As your tower grows taller, the cumulative weight pressing down on the bottom-floor joints increases dramatically. Furthermore, upper floors experience amplified sway from wind and worker movement, creating severe bending moments at the base.
To reach maximum height milestones safely, adopt a tapered structural profile—often referred to as the "Stepped Pyramid" or "Setback" architecture. By making each successive floor slightly narrower and lighter than the floor beneath it, you naturally lower the center of gravity and reduce the overall wind resistance profile of the upper spire.
Vertical Construction Checklist
- Stage 1 (Floors 1–3): Construct a wide, double-walled foundation grid using concrete and reinforced steel joints.
- Stage 2 (Floors 4–7): Transition to single-wall steel frame construction with dense internal diagonal bracing.
- Stage 3 (Floors 8+): Use lightweight timber frames, aluminum trusses, and open-air lattices to finish upper spires.
10. How to Achieve Maximum Safety Ratings and Complete Hard Challenges
Every stage in Dumb Ways to Build evaluates your completed structure using a three-star rating system based on three core metrics: Structural Stability, Budget Conservation, and Worker Survival Rate. Achieving a perfect score requires balancing aggressive engineering with strict site safety protocols.
To maximize your safety rating, never clear a stage while structural joints are actively flashing red or yellow. Even if the building stands long enough to trigger the end-of-stage timer, lingering stress penalties will dock your final star score. Take the time to apply final stabilization ties, clear unnecessary debris from worker walkways, and ensure every Bean is standing in a designated safe zone before submitting your build for final evaluation.
Conclusion: Reconciling Chaos with Engineering
Mastering Dumb Ways to Build is ultimately a journey of balancing scientific precision against hilarious, unpredictable chaos. The game demands that you think like a structural engineer while remaining flexible enough to adapt when a clumsy Bean worker accidentally drops a heavy girder through your main support framework. By mastering material hierarchy, foundation anchoring, environmental mitigation, and workforce routing, you transform what could be a frustrating exercise in destruction into a deeply rewarding display of architectural resilience.
As you tackle the game’s most grueling late-stage challenges, remember that failure is an essential part of the design loop. Every collapsed tower, snapped cable, and tumbling Bean offers valuable visual data about structural load paths and stress concentrations. Embrace the collapse, analyze the failure points, adjust your structural blueprint, and return to the drafting grid ready to build stronger, higher, and safer than before.
Learn to master physics, material choices, structural framing, and Bean safety to build stable towers and conquer chaotic challenges in Dumb Ways to Build.